I have spent many days now looking at litterelly hundreds of ways to install Motion on a Raspberry Pi . There are many pretty simple solutions if you are using a powered USB Hub and standard Webcam. However, if you are using a Raspberry Pi Cam or the new NOIR Cam them you’re out of luck.
Luckily there is a MMAL version of Motion that sorts out Motion to use the inbuilt camera rather than a USB one.
These notes are more for me to get it working again in case it fails. I am no Linux guru so they should be fairly easy to follow.
Step 1 – Head over to the Raspberry forums and download a copy of NOOBS – New Out Of the Box Software (NOOBS) and then the SD Card Formatting Software. You are going to need both of these.
- Downloads Page – Raspberry Pi NOOBS Software
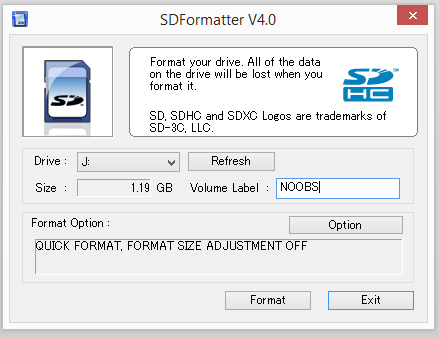
- Format your SD Card using the SD Association Formatting Tool
Step 2 – Format your SD Card using the SD Card tool you just downloaded.
Step 3 – Extract the NOOBS file onto your SD Card. Right Click, Extract to… And choose the S Card.
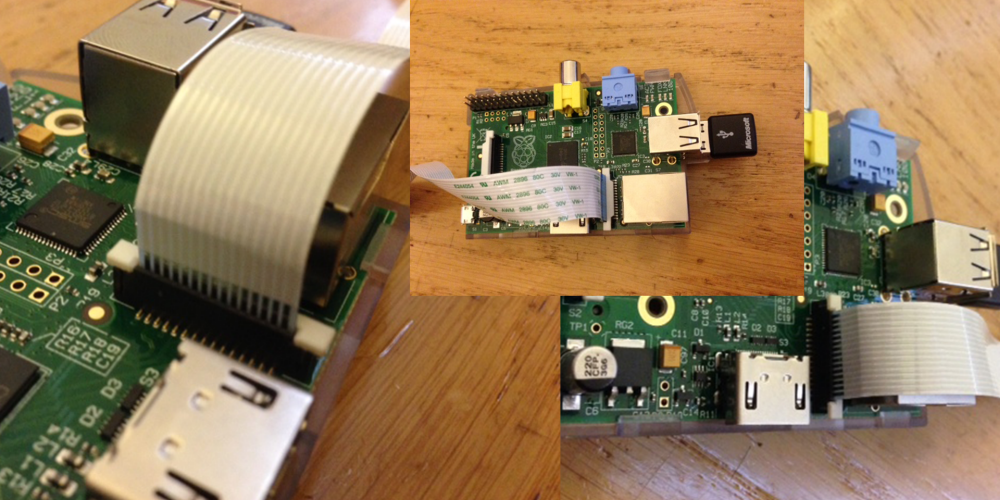
Step 4 – Plug your camera into the board.
If you are not sure, the silver pins face into the board like the picture below.
Step 5 – Plug your SD Card into the Raspberry Pi and power it on. Go to ebay and buy a wireless camera for £30…. Just kindding, continue below.
Step 6 – At the NOOBS Screen click on Raspban (Recommended) and then the install button at the top left. Click yes on the confirmation screen and wait 5 minutes or so.
Step 7 – Once the Raspberry boots you get an option menu.
- Go to option 2 – Change User Password – CHANGE YOUR PASSWORD
- Go to option 3 – Enable Boot to Desktop and choose the second option Desktop Login as user ‘p’ at the graphical desktop.
- Go to Option 5 – Enable Camera Support
- Click finish and wait for the reboot.
Step 8 – Configure your WiFi
- You can do this through the Terminal or via the GUI… I chose the GUI, If you choose the Terminal these are the commands
sudo nano /etc/network/interfaces
USEFULL TIPS ON NANO
To search use “Ctrl + W”
To Save use “Ctrl + O”
To Exit use “Ctrl + X” or “Ctrl + Z”
Your keypad numbers with arrows will make it go wierd, do not use them, use the numbers above the keyboard.
Make it look like this
auto lo

iface lo inet loopback
iface eth0 inet dhcp

allow-hotplug wlan0
auto wlan0

iface wlan0 inet dhcp
wpa-ssid "your networks ssid without these quotes"
wpa-psk "key to your network without these quotes"
Step 9 – Updating your Pi to install motion
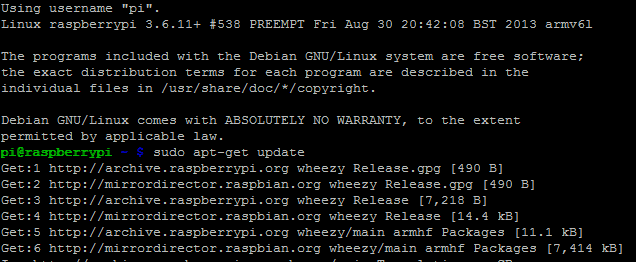
$ sudo apt-get update
$ sudo apt-get upgrade
Step 10 – Installing Motion
$ sudo apt-get install -y libjpeg62 libjpeg62-dev libavformat53 libavformat-dev libavcodec53 libavcodec-dev libavutil51 libavutil-dev libc6-dev zlib1g-dev libmysqlclient18 libmysqlclient-dev libpq5 libpq-dev
$ sudo wget https://www.opsactive.com/wp-content/uploads/2013/11/motion-mmal.tar.gz
$ sudo tar zxvf motion-mmal.tar.gz
Step 11 – Install WPUT
This is so you can send your images over to your FTP site. If you do not install this now, please do so before trying to upload your images.
sudo apt-get install wput
Step 12 – Prepare motion to auto start by moving and renaming the motion-mmal
$ sudo mv motion-mmalcam.conf /etc/motion.conf
$ sudo mv motion /usr/bin
Step 13 – Making Motion AutoStart
Edit the rc.local file by adding – motion
$ sudo nano /etc/rc.local
#!/bin/sh -e
#
# rc.local
#
# This script is executed at the end of each multiuser runlevel.
# Make sure that the script will "exit 0" on success or any other
# value on error.
#
# In order to enable or disable this script just change the execution
# bits.
#
# By default this script does nothing.

# Print the IP address
_IP=$(hostname -I) || true
if [ "$_IP" ]; then
printf "My IP address is %s\n" "$_IP"
fi

# Start motion
motion

exit 0
Step 14 – Before you reboot the Pi run this to make it create everything it needs.
$ sudo motion
To stop it press “Ctrl + Z”
Step 15 – Configure your settings
$ sudo nano /etc/motion.conf
Create a folder in your /Home/Pi folder called images and modify your motion.conf to put the images there.
Step 16 – Now reboot your Pi
$ sudo reboot
Step 17 – Tweak your config and reboot after saving.
I modified my Config file slightly to have the following – It also uploads to my FTP Server 😉
Daemon On – so it runs in the background
Image File Output – quality 100
ffmpeg_output_movies off
target_dir /home/pi/images
on_picture_save wput --binary --remove−source−files ftp://USERNAME:PASSWORDHERE@IPORDOMAIN %f
NB!!!!! there is an ; before the on_picture_save you need to remove it and it must all be on one line.
For a fill list of Config options check out http://www.lavrsen.dk/foswiki/bin/view/Motion/ConfigFileOptions
Step 18 – Slow the capure of images down
Change the frame rate from 0 to another number. By default its 2 per second but I think 1 picture every 3 to 5 seconds is plenty. Enter an amount in seconds. 0 means 2 per second! ! !
minimum_frame_time 3
Step 19 – Turn off the Red LED
I dont want to shout – “Hey everyone I have a camera on…” – You can turn the Red LED on the raspberry Pi Camera off…
Simply edit the boot config file.
sudo nano /boot/config.txt Add
disable_camera_led=1 Save the File This is a thanks to Matt for this one over in the Raspberry Forums


